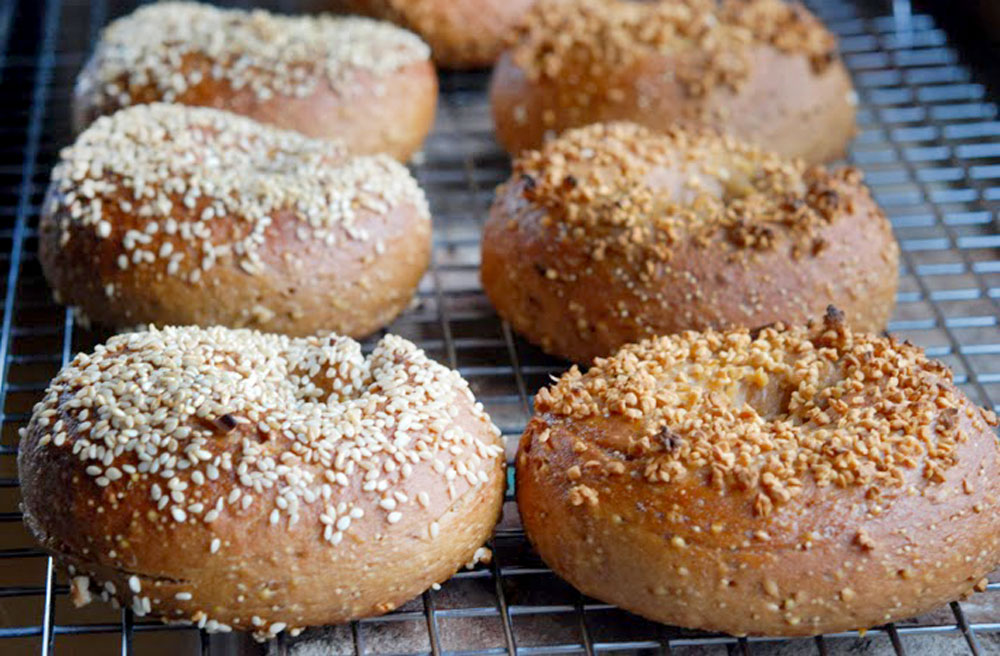

I rarely eat bagels anymore. It’s not that I don’t like them, on the contrary. Rather, authentic bagels are simply not available in Chicago. However, last year, I was in Philadelphia visiting family, and made a special trip to the Bagel Hole (a quintessential “hole-in-the-wall”) in Park Slope, Brooklyn, to get a dozen bagels to bring back to Chicago [I could smell them on the plane the whole way home]. Now, that’s a bagel — nice crispy shell with a soft, chewy interior. Simply perfect!
If you do not have the good fortune of living in the New York metropolitan area, then chances are you may not be able to find a true bagel either. The ones made by the likes of Einstein Bros., Panera, and other unmentionables do not deserve to be called bagels. Why? Because, many baking companies have switched to steaming bagels instead of boiling them to save time (and money). Omitting this critical step results in something that lacks the texture and taste of a genuine bagel. Instead, you wind up with a soft, doughy roll. Same old story, quantity over quality, at least for corporate America.
The health/nutrition aspects of food are certainly important, though, in my book, taste is equally important (if it’s healthy but doesn’t taste good, who wants to eat it?). I was curious to see how the bagels would come out using a mixture of whole wheat flour and other grains (millet, amaranth, flax seeds, and cracked wheat). I like the texture of mulitgrain and the nuttiness that these grains/seeds impart. As this recipe is from a well-established baker, Peter Reinhart [Whole Grain Breads: New Techniques, Extraordinary Flavor], I was confident that the end product would be well worth the effort.
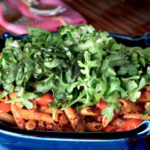
These bagels pair well with the wild sockeye salmon I’ve been curing in the refrigerator. If only locally-grown tomatoes were in season…
The following recipe has quite a few steps, though it’s actually very straightforward, and not as time consuming as you might think. Definitely something best suited for the weekend, as there are several steps that require long ferment times, but luckily the dough (and not you) is doing all the work.
DAY 1: Prepare the Soaker and Biga (started this on Friday @ 5:00 pm)
SOAKER: A non-fermented pre-dough containing grain, along with water or other liquid, and sometimes salt. Soaking the grain initiates the enzyme activity in advance of fermenting the dough.
2/3 cup (3 ounces) whole wheat flour (used King Arthur’s white-wheat flour)
1 cup + 2 tablespoons (5 ounces) any combination of cooked and uncooked grains (I used a combination of flax seeds, millet, amaranth, and cracked wheat)
½ teaspoon (.14 ounces) salt
2 tablespoons (1.25 ounces) barley malt
½ cup + 2 tablespoons (5 ounces) water
Step 1. Mix all the soaker ingredients together in a bowl for about 1 minute, until all of the flour is hydrated. Let the soaker rest for 5 minutes, then mix again for 1 minute until the ingredients form a thick, porridge-like dough.
Step 2. Cover loosely with plastic wrap and leave at room temperature for 12-24 hours.
BIGA: The Italian name for pre-fermented dough. It is usually a stiff dough with a small amount of yeast and no salt.
1 ¾ cups (8 ounces) whole wheat flour (used King Arthur’s white-wheat flour)
¼ teaspoon (.03 ounce) instant yeast
½ cup + 2 tablespoons (5 ounces) filtered or spring water, at room tempera ture
Note: I used Chicago tap water (instead of filtered or spring water), hopefully this will not deter from the taste
Step 3. Mix all the biga ingredients together in a bowl to form a ball of dough. With wet hands, knead all the dough in a bowl for 2 minutes to be sure all the ingredients are evenly distributed and the flour is fully hydrated (dough should feel tacky). Let the dough rest 5 minutes, then knead again with wet hands for 1 minute. The dough will become smoother but still tacky.
Step 4. Transfer the dough to a clean bowl, cover tightly with plastic wrap and refrigerate for at least 8 hours and up to 3 days.
Step 5. About 2 hours before mixing the dough, remove the biga from the refrigerator to take off the chill. It will have risen slightly but need not to have risen significantly in order to use it in the final dough.
DAY 2: Prepare the Final Dough (Saturday morning)
FINAL DOUGH
Soaker (see above)
Biga (see above)
2 ¼ teaspoons (.25 instant yeast)
2 tablespoons (1 ounce) water, room temperature
5/8 teaspoon salt (.18 ounces)
7 tablespoons (2 ounces) whole wheat flour (used King Arthur’s white-wheat flour)
Egg wash (1 egg white beaten with 1 tablespoon water and a pinch of salt)
Toppings: poppy seeds, sesame seeds, course sea salt, dried minced garlic or onion [rehydrate garlic and onion in water]
Step 6. Using a metal pastry scraper, chop the soaker and biga into 12 smaller pieces each. Sprinkle a little flour over the pieces to prevent from sticking to each other.


Step 7. Stand Mixer Method: Dissolve the yeast in the water in the mixing bowl, add the soaker and biga pieces and the salt, and mix on slow speed with the dough hook for 1 minute to bring the ingredients together into a ball. Add the 7 tablespoons of whole wheat flour and continue to mix on either low or medium-low speed for 3-4 minutes, occasionally scraping down the bowl. Add more flour or water as needed until the dough is firm and not sticky.
Step 8. Dust a work surface with flour, then roll the dough in the flour to coat. Knead the dough by hand 3-4 minutes, incorporating enough flour as needed to form a stiff dough. Form the dough into a ball and let it rest on the work surface for 5 minutes while you prepare a clean, lightly oiled bowl.
Step 9. Resume kneading the dough for 1 minute to strengthen the gluten (dough should be firm when fully kneaded and pass the windowpane test) and feel supple and satiny (ended up kneading for an additional 5-6 minutes before the dough felt smooth to the touch).
Windowpane test: The most reliable method to determine when gluten development is sufficient. This is performed by cutting off a small piece of dough and gently stretching, pulling, and turning it to see if it will hold a paper-thin, translucent membrane. If the dough falls apart, continue mixing for another minute or two. It is very difficult to overmix bread dough.
Step 10. Form the dough into a ball and place in the oiled bowl, rolling it to coat with oil. Cover loosely with plastic wrap and let rise at room temperature for 45-60 minutes, until about 1 ½ times its original size. Meanwhile, prepare a sheet pan, by lining it with parchment paper or a silicon mat and dusting with whole wheat flour or cornmeal.
Shaping the bagels:
Step 11. Transfer the dough to a lightly floured work surface and divide it into six or seven 4-ounce pieces.
Roll the pieces into an 8-inch rope and shape it into a circle around your hand. Seal it tightly at the point where the two ends overlap by squeezing or pressing it into the counter. There should be a two inch diameter in the center (used this technique). Or…
Take a piece of dough, poke a hole in the middle with your finger, enlarge a bit, and twirl the dough around your finger on the floured surface until the hole is an inch or two in diameter (next time will try this technique).


DAY 3: Sunday morning (you can do this step day 2, but I didn’t have time on Saturday, so I placed the bagels in the refrigerate overnight, and finished them Sunday morning).
Step 12. Place the bagels on the sheet pan, cover loosely with a cloth towel and leave out at room temperature while you move on to the next step (you can also refrigerate the pan up to 24 hours if you plan on making the bagels later, cover with plastic).
Note: if refrigerating overnight; take the dough out and let it come up to room temperature for about 1 hour (about the time it takes for the oven and stone to preheat).
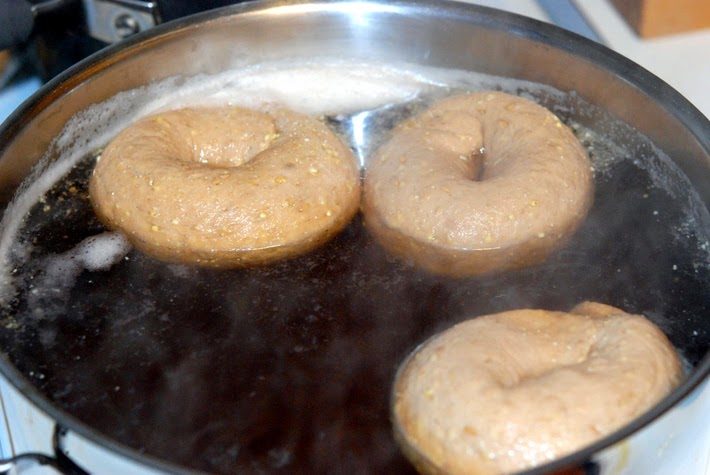
Step 13. Preheat the oven with a baking stone (at least 1 hour) to 500°F. Meanwhile, in a large pot bring 2 quarts (64 oz) water and 2 tablespoons non-diastolic malt powder or barley malt syrup to a boil (makes shiny shell). Lower the heat to maintain a steady simmer.
Step 14. The bagels should be ready to boil within 20-30 minutes of shaping. Place one bagel into the pot. It should float within 30 seconds. If not, boil until it does float and remove it from the water, but wait 5 minutes before boiling another, repeating the float test. When they pass the test, boil two to four bagels at a time, gently turning them after 30 seconds so they boil for a total of 1 minute. Using a slotted spoon, remove them from the water.
Step 15. When all the bagels have been boiled, apply the toppings, using egg white wash [egg white from 1 egg + 1 Tablespoon water].
Note: to rehydrate granulated garlic, use 2:1 ratio water to garlic (1/4 cup of granulated garlic to 1/2 cup of water, should be plenty for 1 batch of bagels). Let sit for about 20 minutes, and garlic will absorb most of the water. Drain any excess water. If you omit this step, the garlic will burn.
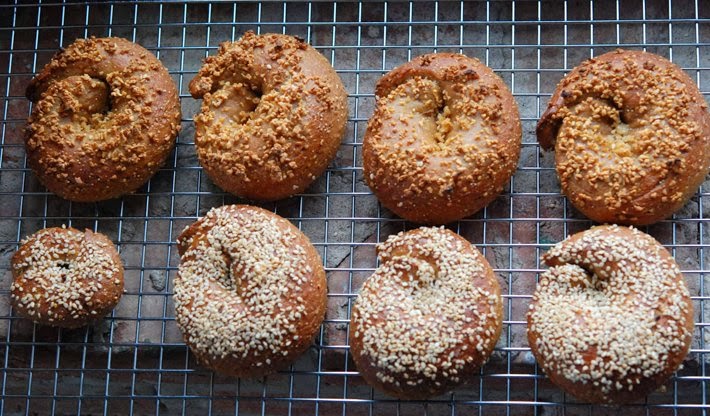
Place the bagels on the baking stone and lower the temperature to 450°F. Bake for 15 minutes. Rotate the bagels 180°F and bake another 10-15 minutes, until the bagels are a rich brown on the top and bottom.

Step 16. Transfer the bagels to a cooling rack and cool for 20 minutes before serving.


4 comments
Anonymous
I just made these and they turned out great! Thanks for the recipe 🙂
Anonymous
I just made these and they turned out great! Thanks for the recipe 🙂
Lauren
I also made the bagels and really love the results! I was nervous about the amount of whole grains so I incorporated roughly 10% bread flour for the wheat flour. The biggest change I made was to use 296g of 100% hydration sourdough starter + 79g whole wheat flour for the biga. I didn’t use any commercial yeast in the recipe. Because of timing, I allowed for overnight rises for the first and second rises. My starter was really active and the results are great – very hearty, but with a relatively open crumb. I’ll make again. Thanks for sharing!
wildgreensandsardines@gmail.com
Hi Lauren, Thanks for sharing your results. You’ve inspired me to make bagels again (haven’t done so in a while). I’m going to incorporate your suggestions next go. Glad they turned out well!