Photographing food sometimes seems a bit silly. Although, I just can’t seem to stop myself. I feel like it’s something that I need to document (although, I’m not sure why?). Take pasta. No matter how many times I make pasta, the process always seems so fascinating. Specifically, that just a few humble ingredients — flour, eggs, salt — can be transformed into such magic. Today, it’s ravioli filled with butternut squash
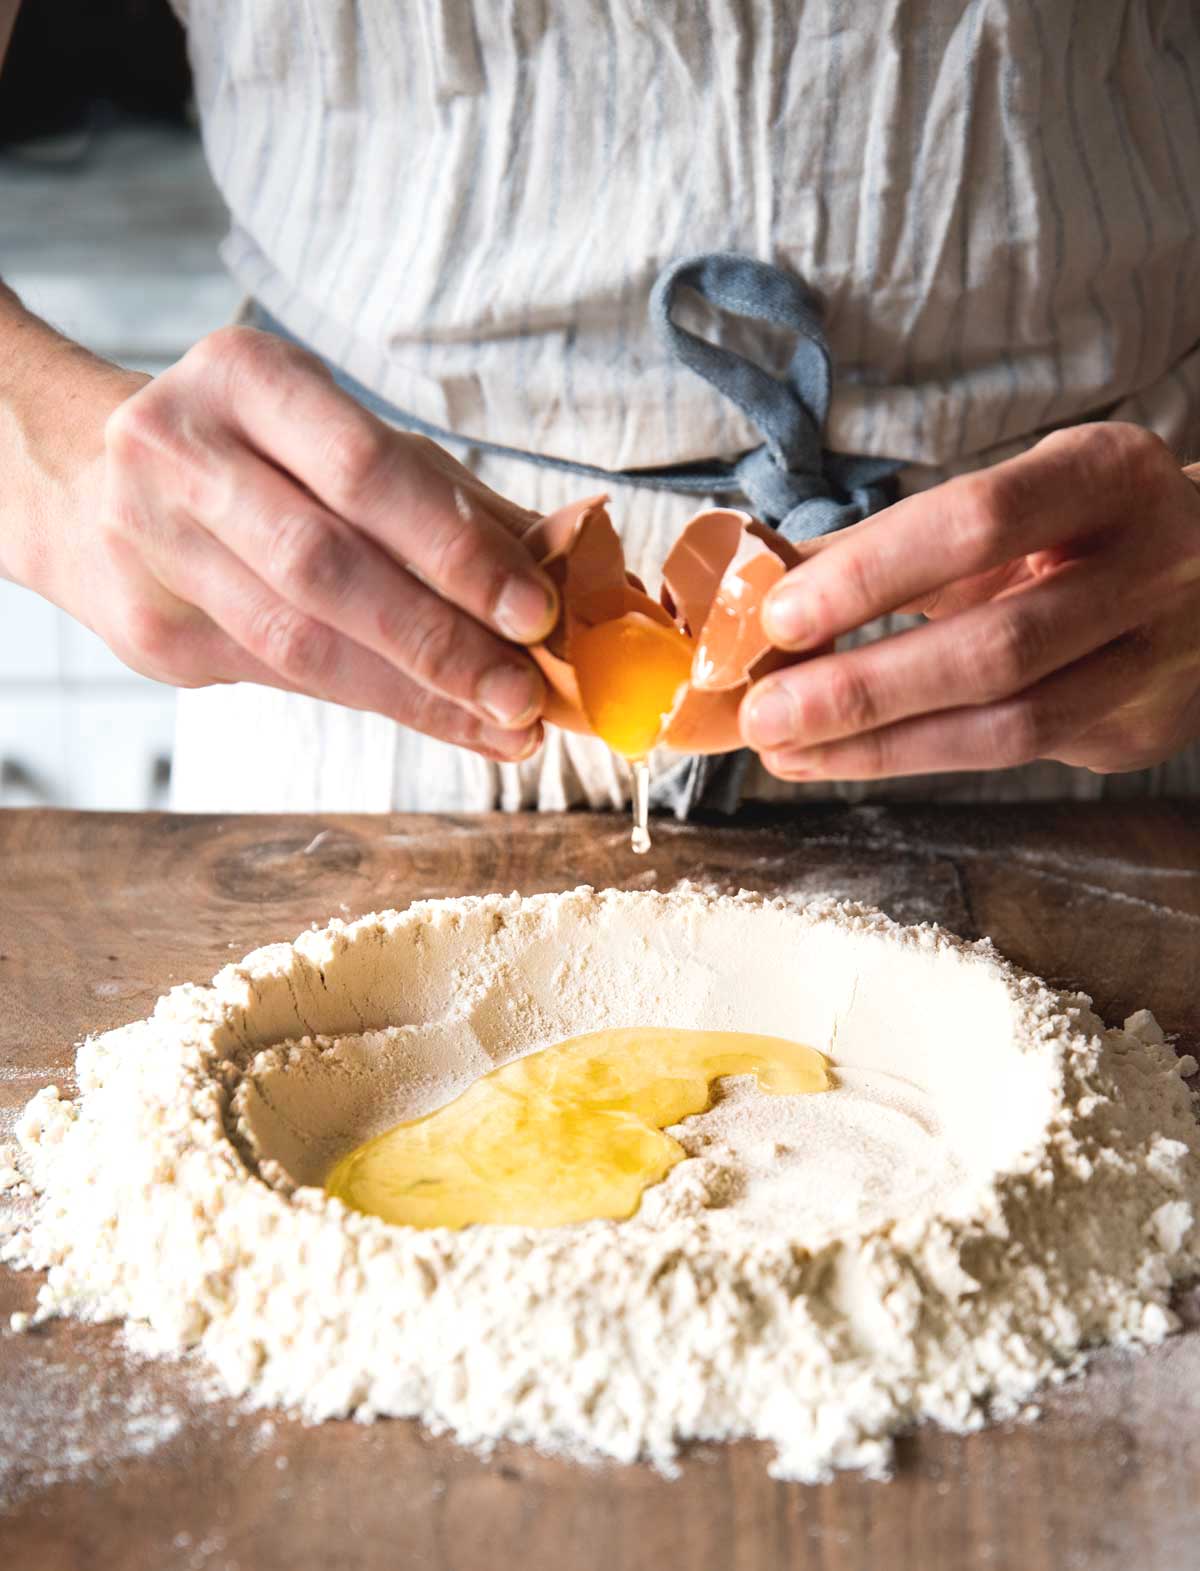
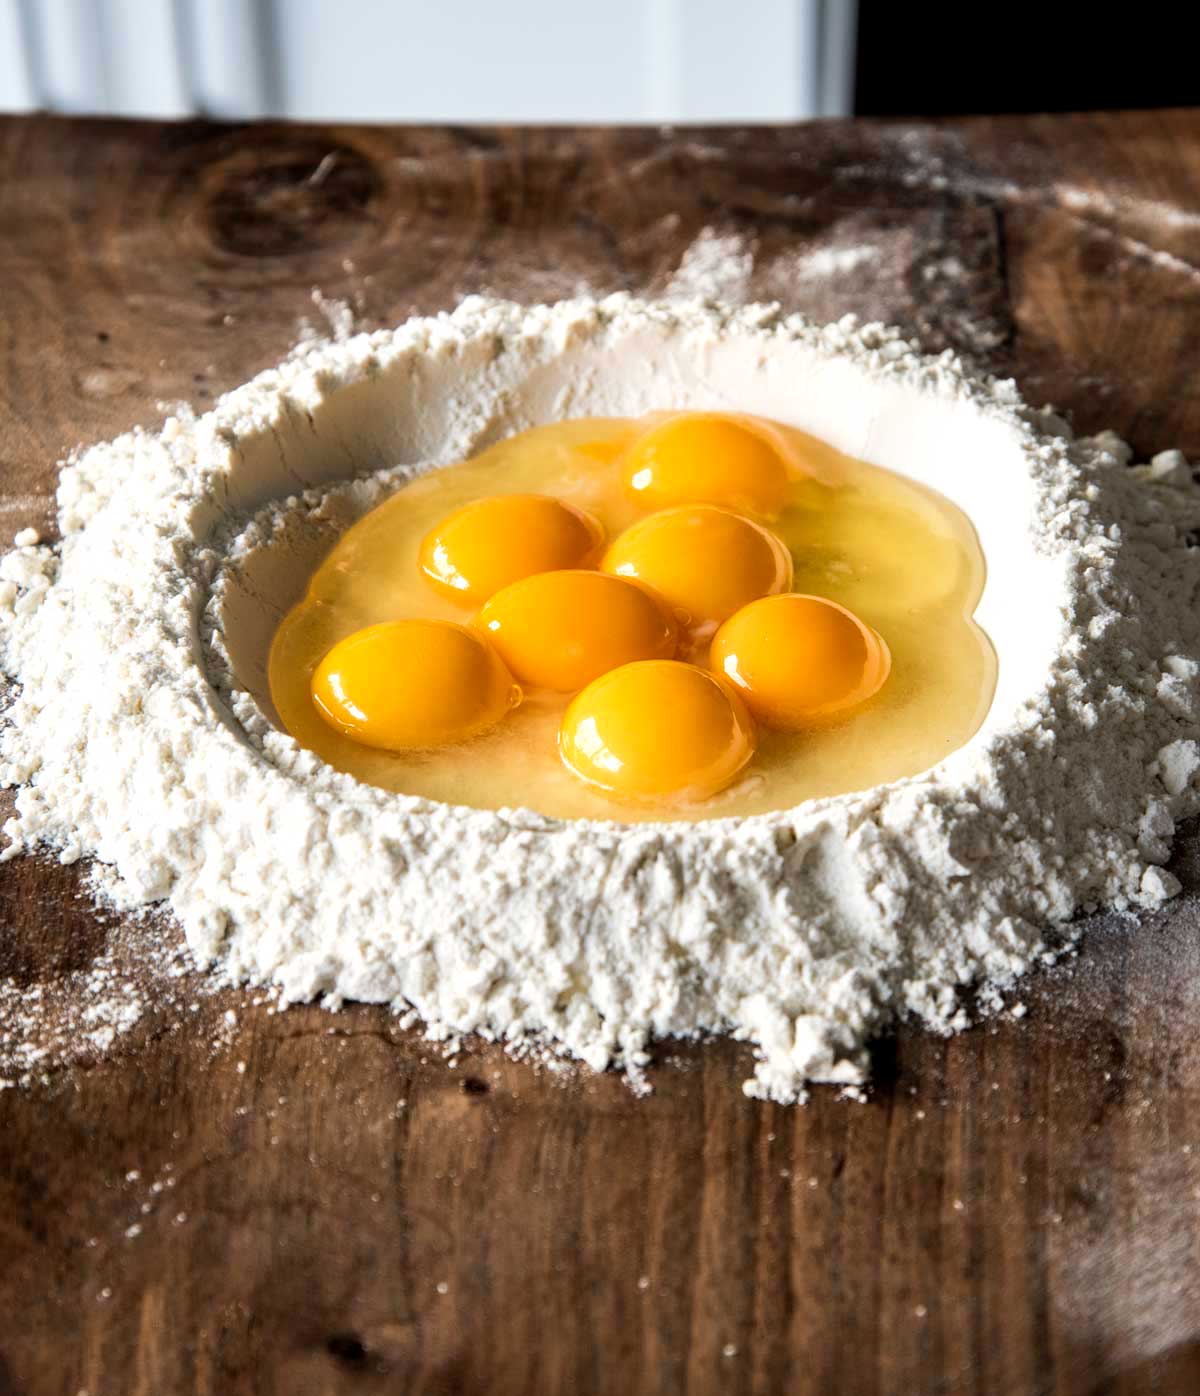
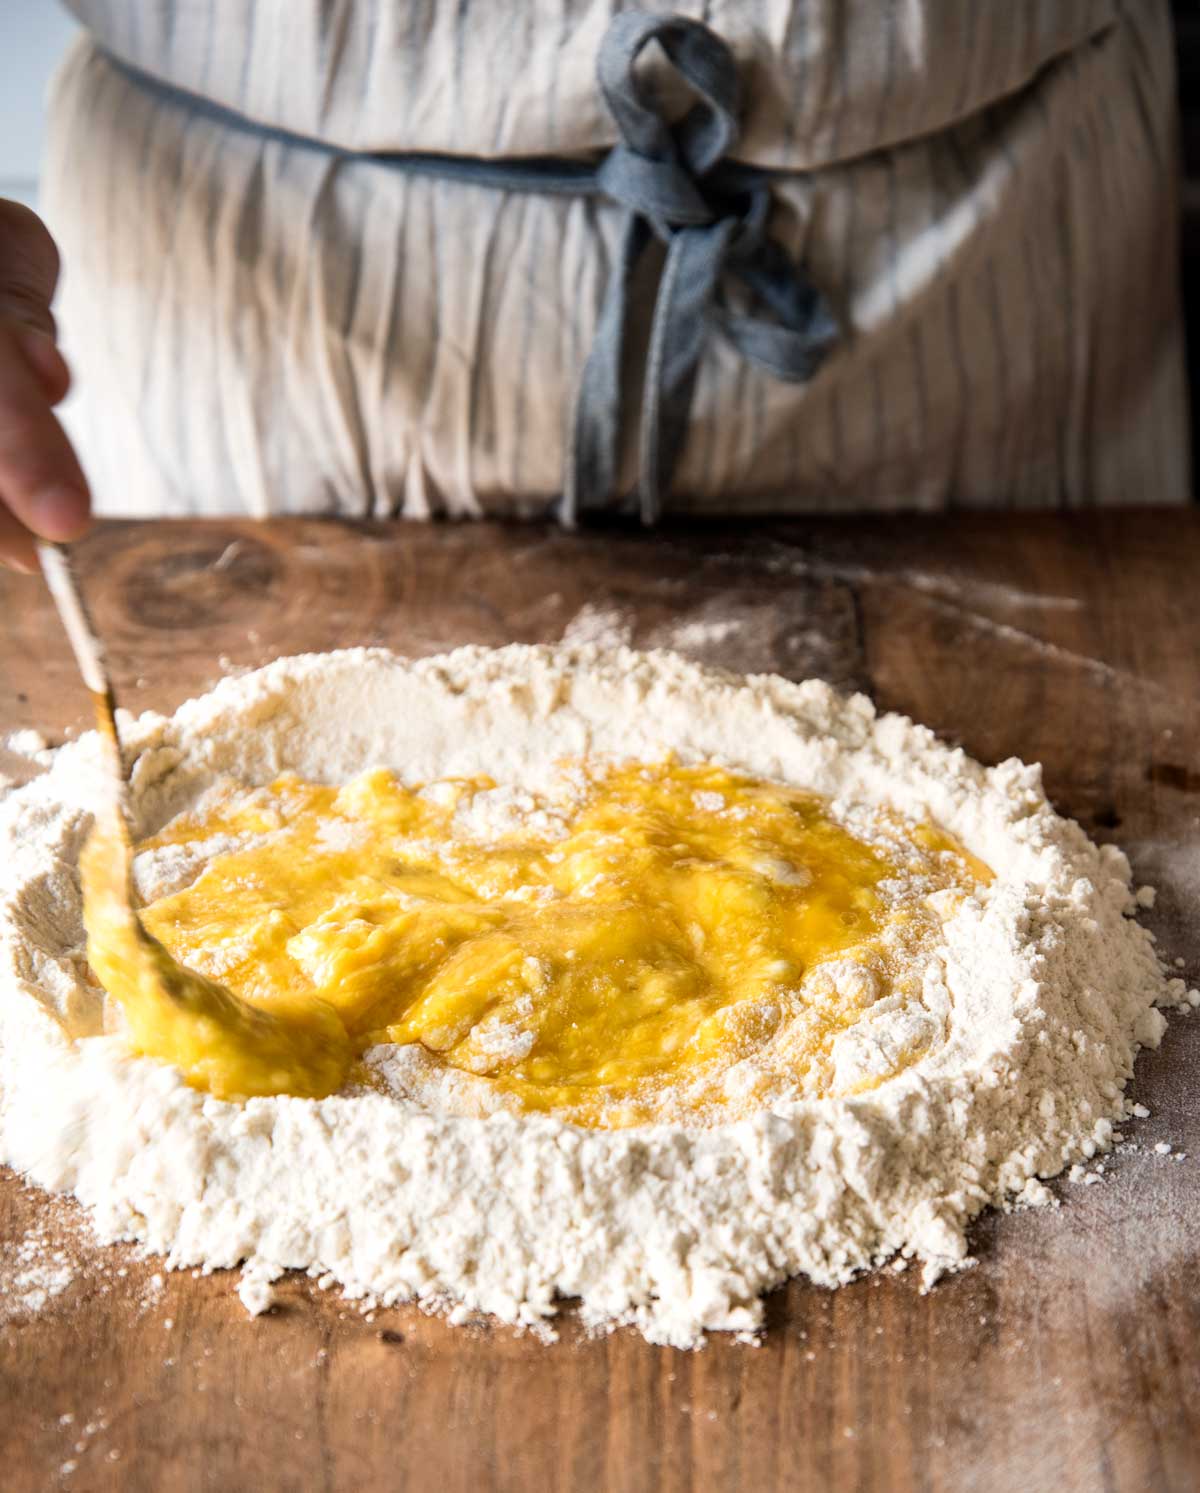
I love the old-school method of making a well with the flour, cracking in the eggs, and getting your hands caked with flour and eggs, kneading until that shaggy mess forms into a beautiful golden, smooth ball of dough. It’s the eggs, which I get from my local farmers’ market, with those vibrant, orange-y yolks (aren’t they beautiful?) that transform the flour into that golden hue. Pure magic!
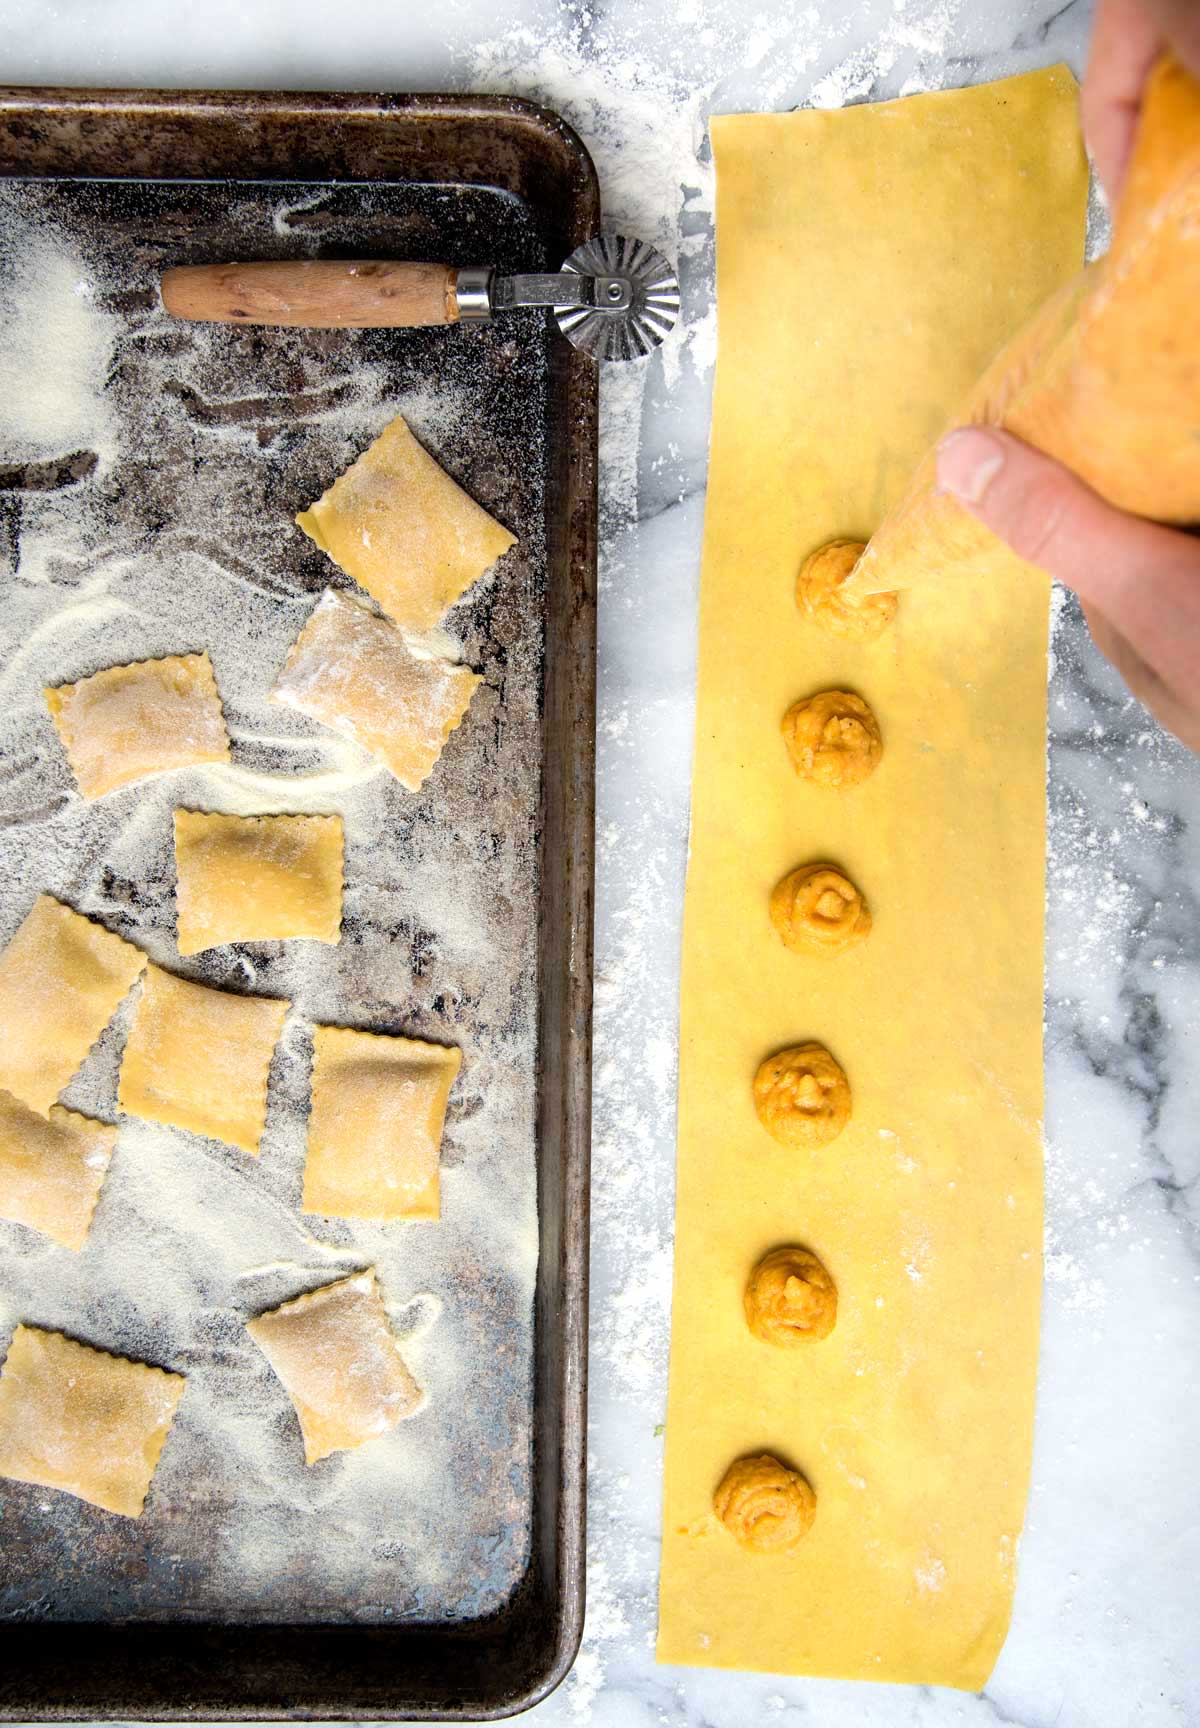
If I really wanted to be old school, I would roll the dough out with a rolling pin until paper thin. However, a pasta roller does make the job easier. I love piping the filling, forming each stuffed pasta; it’s a repetitive, meditative process that I find fulfilling.
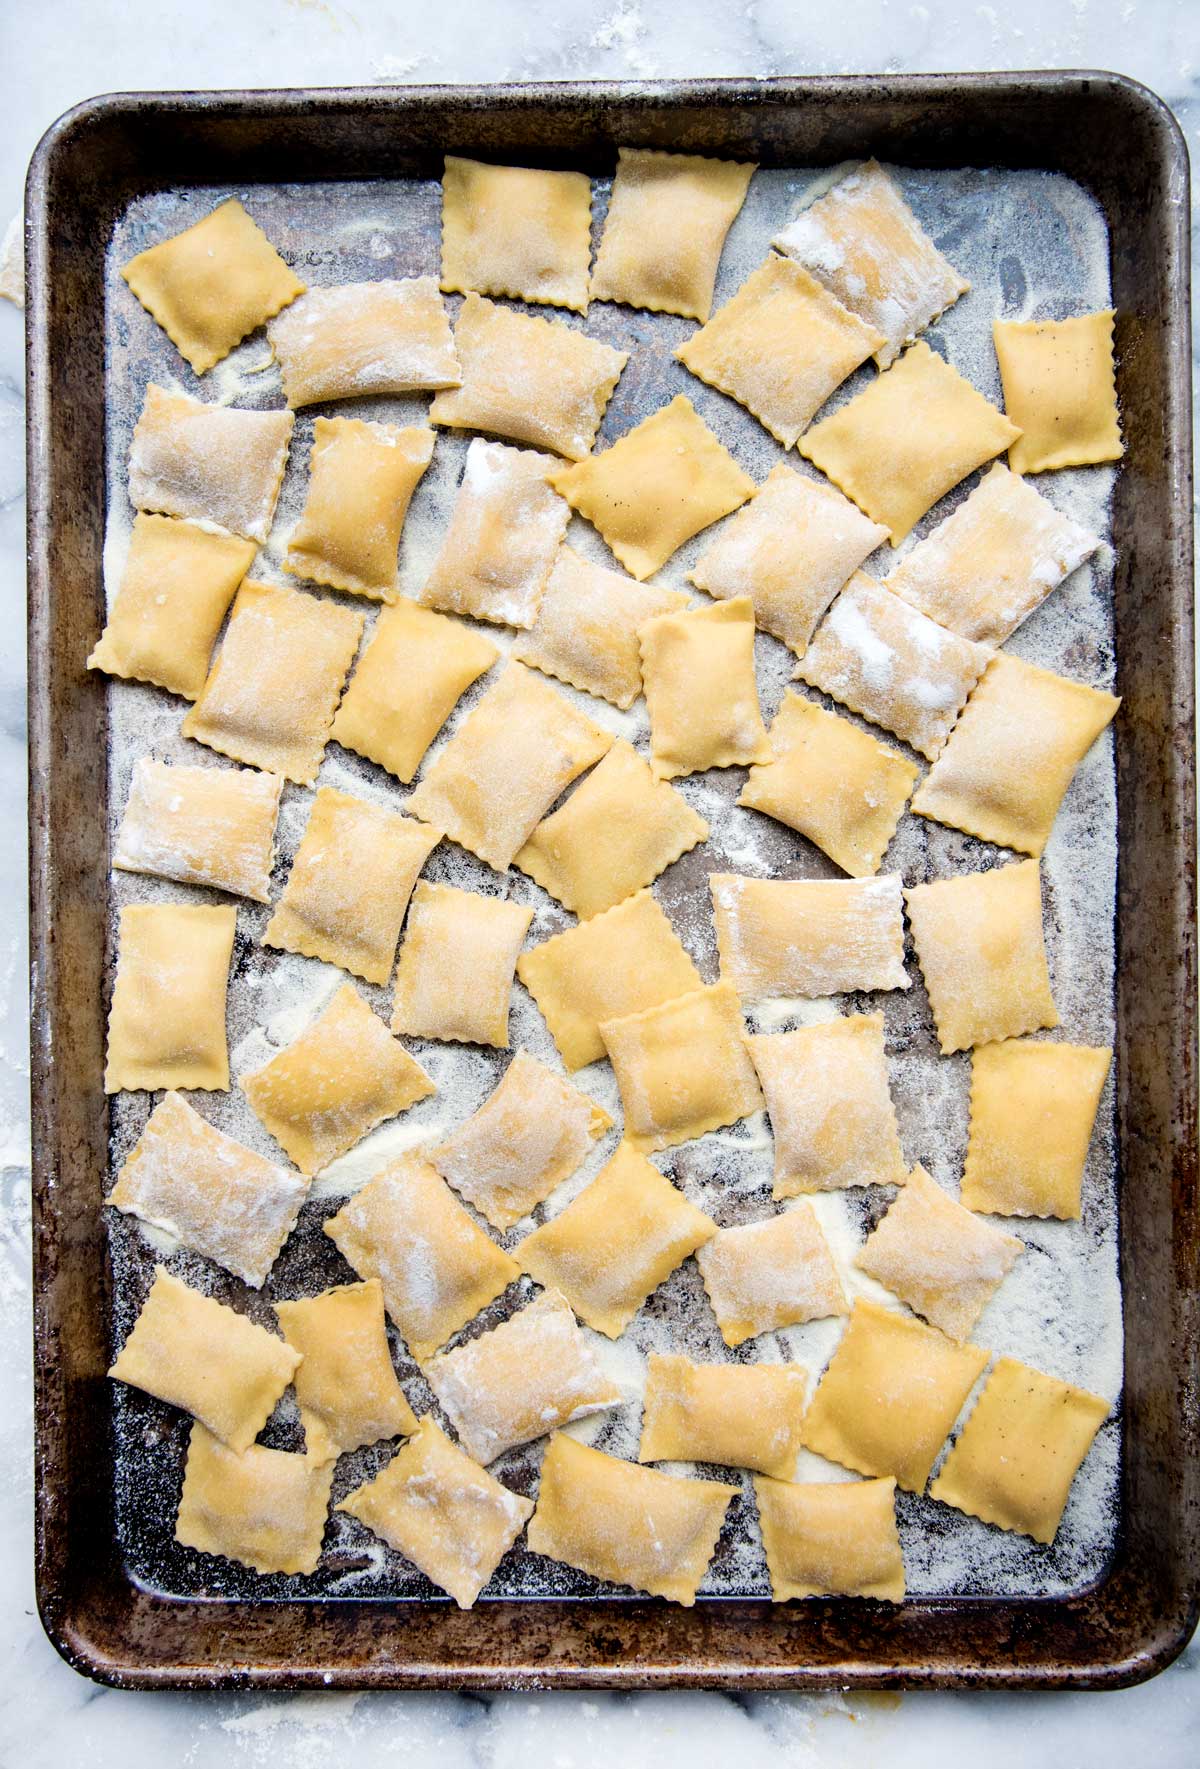
It’s pumpkin/winter squash season, so I went with a simple filling of roasted butternut squash, shallot, ricotta, Parmesan, and nutmeg. The butternut squash ravioli can be frozen so that you can have them whenever you want. Just sprinkle a sheet pan with some semolina to prevent them from sticking, lay them in a single layer, and freeze. Once they’re frozen, you can pop them into a zip-lock bag or air-tight container.
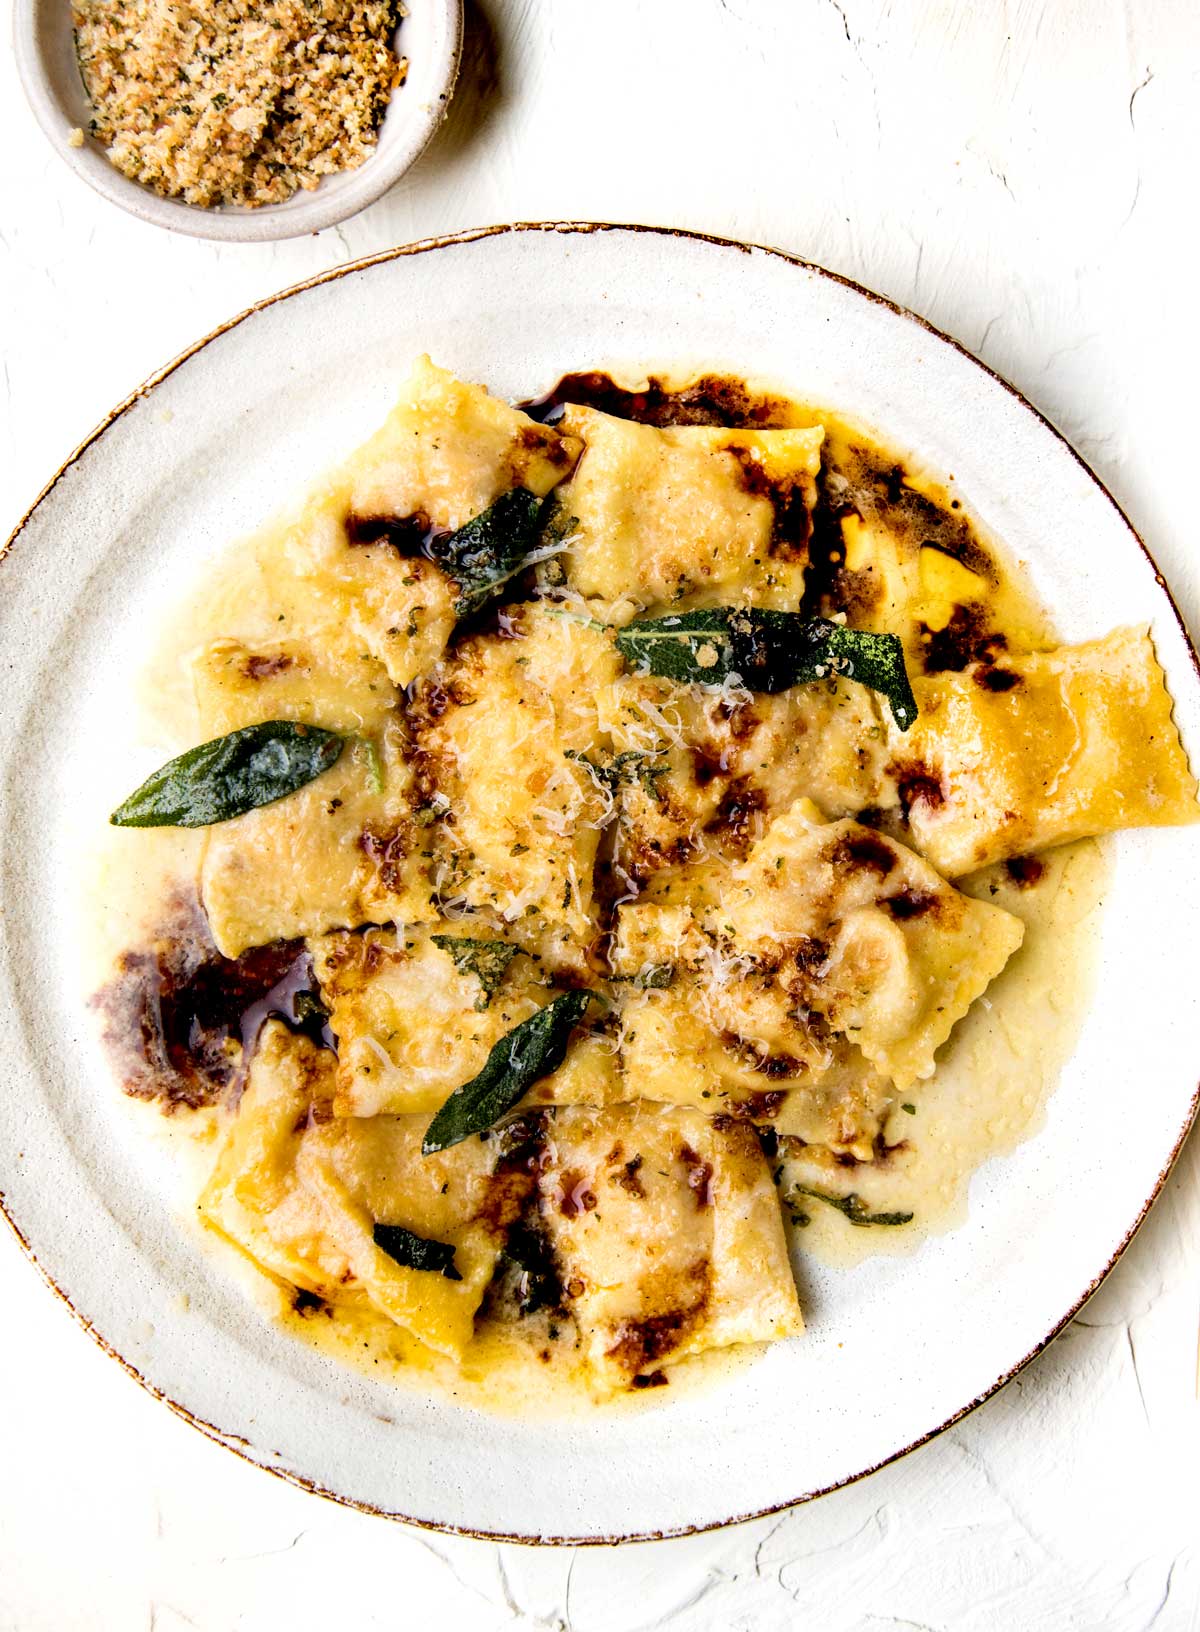
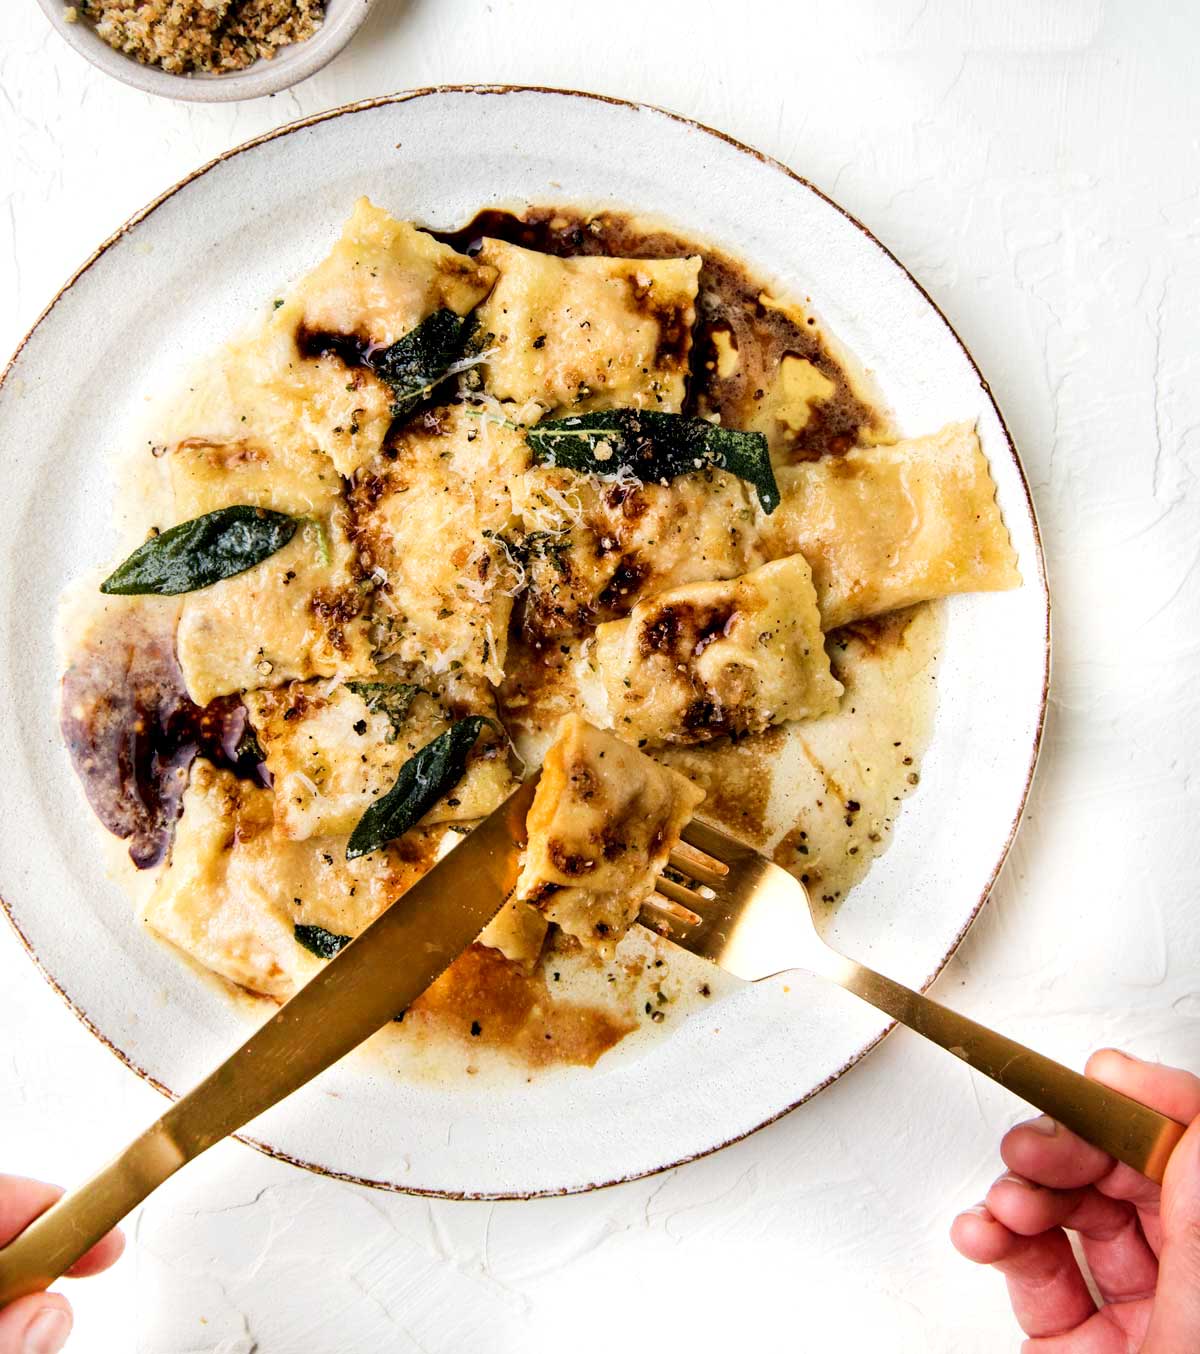
As for the finished dish…after a brief dip in a pot of salted boiling water, I bathed the butternut squash ravioli in a little melted/brown butter, a splash of pasta cooking water, and a grating of Parmesan cheese in a hot pan. Transferred to a serving plate and topped with some crispy sage, toasted breadcrumbs, a splash of good quality aged balsamic vinegar, a little more Parmesan, and a fresh grind of black pepper.
Since I am a team of one, I set my camera on a tripod and used the timer to take these process shots. Hope this inspires you to make homemade pasta…


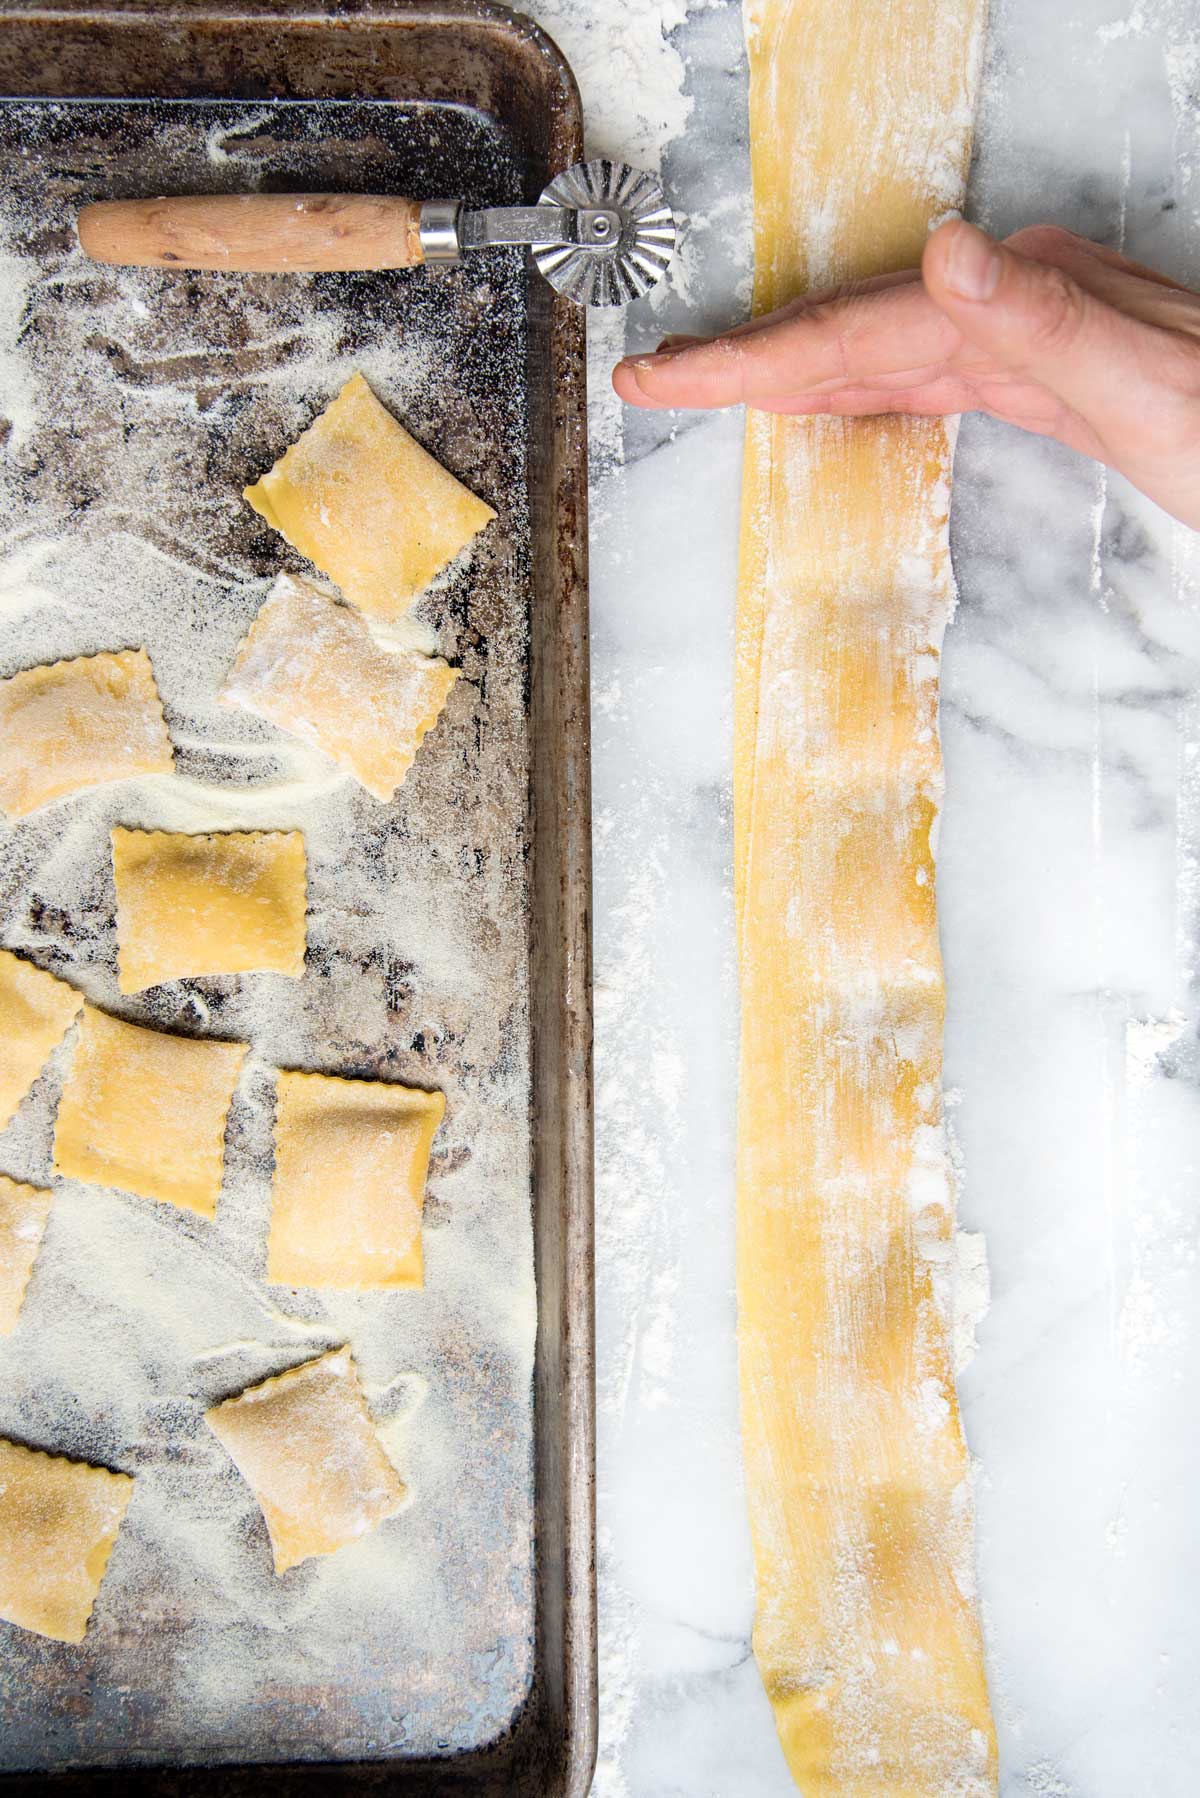
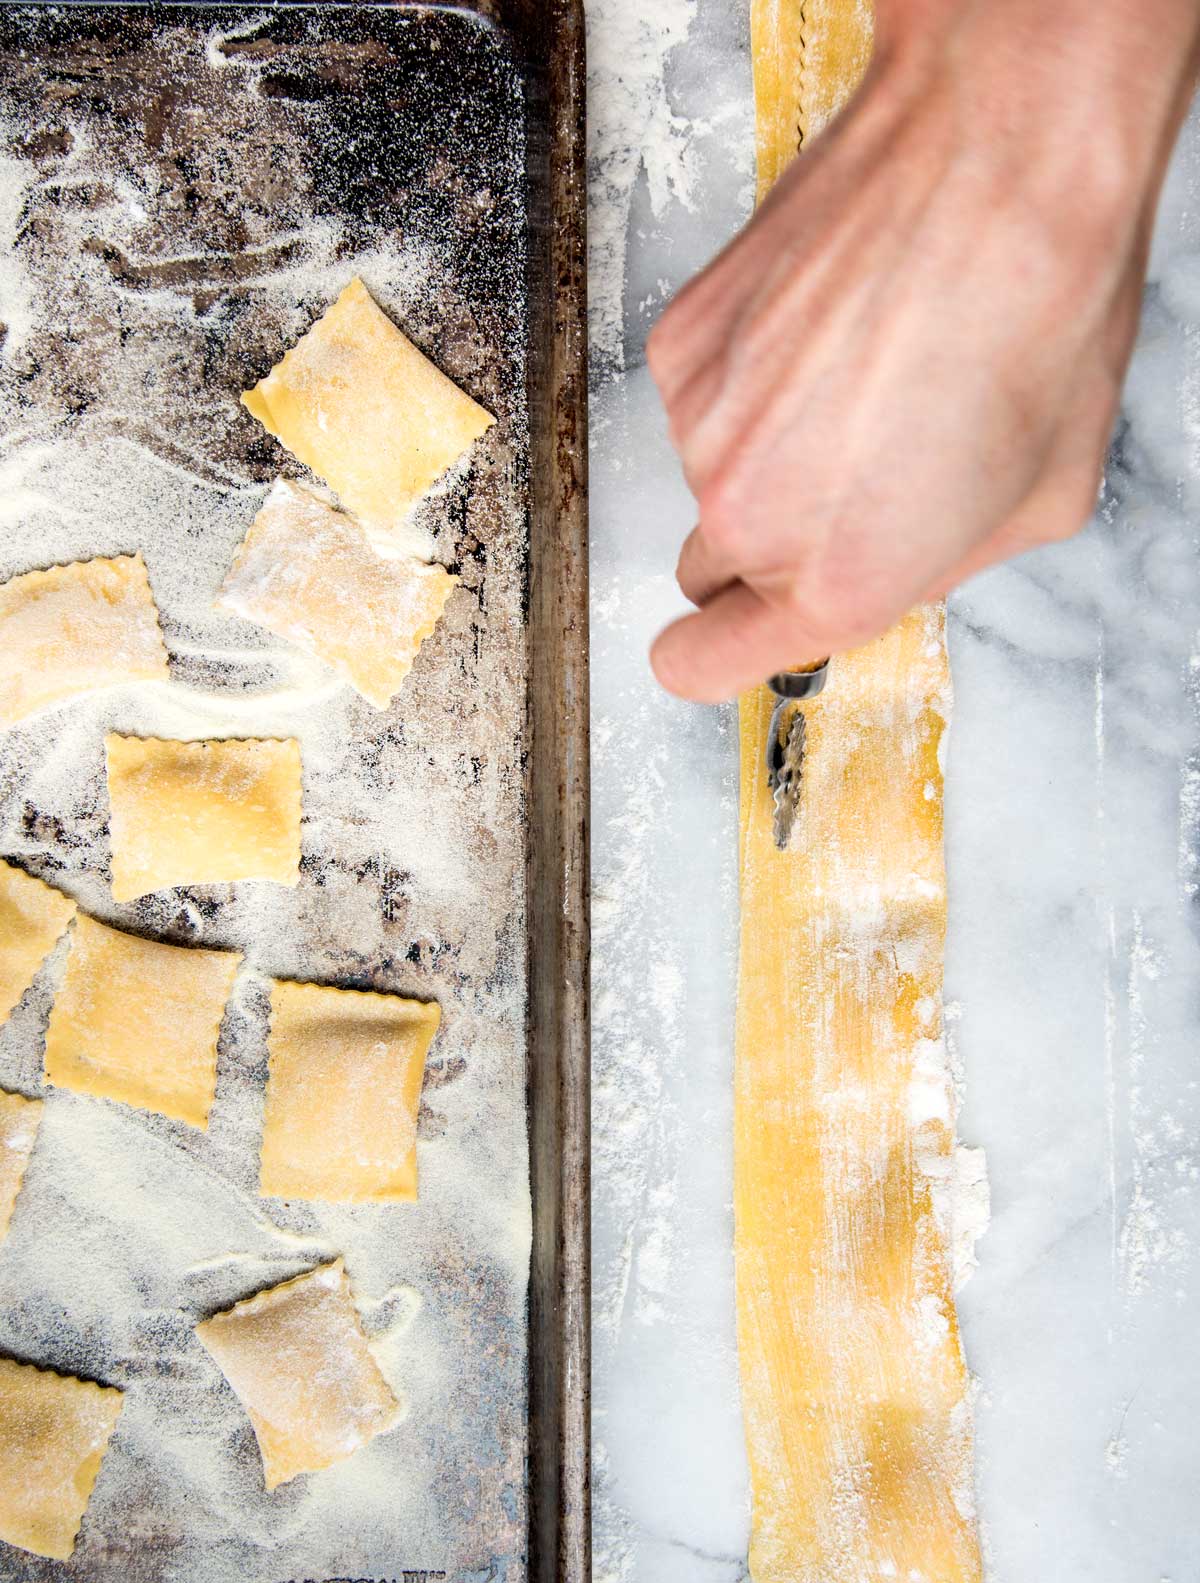
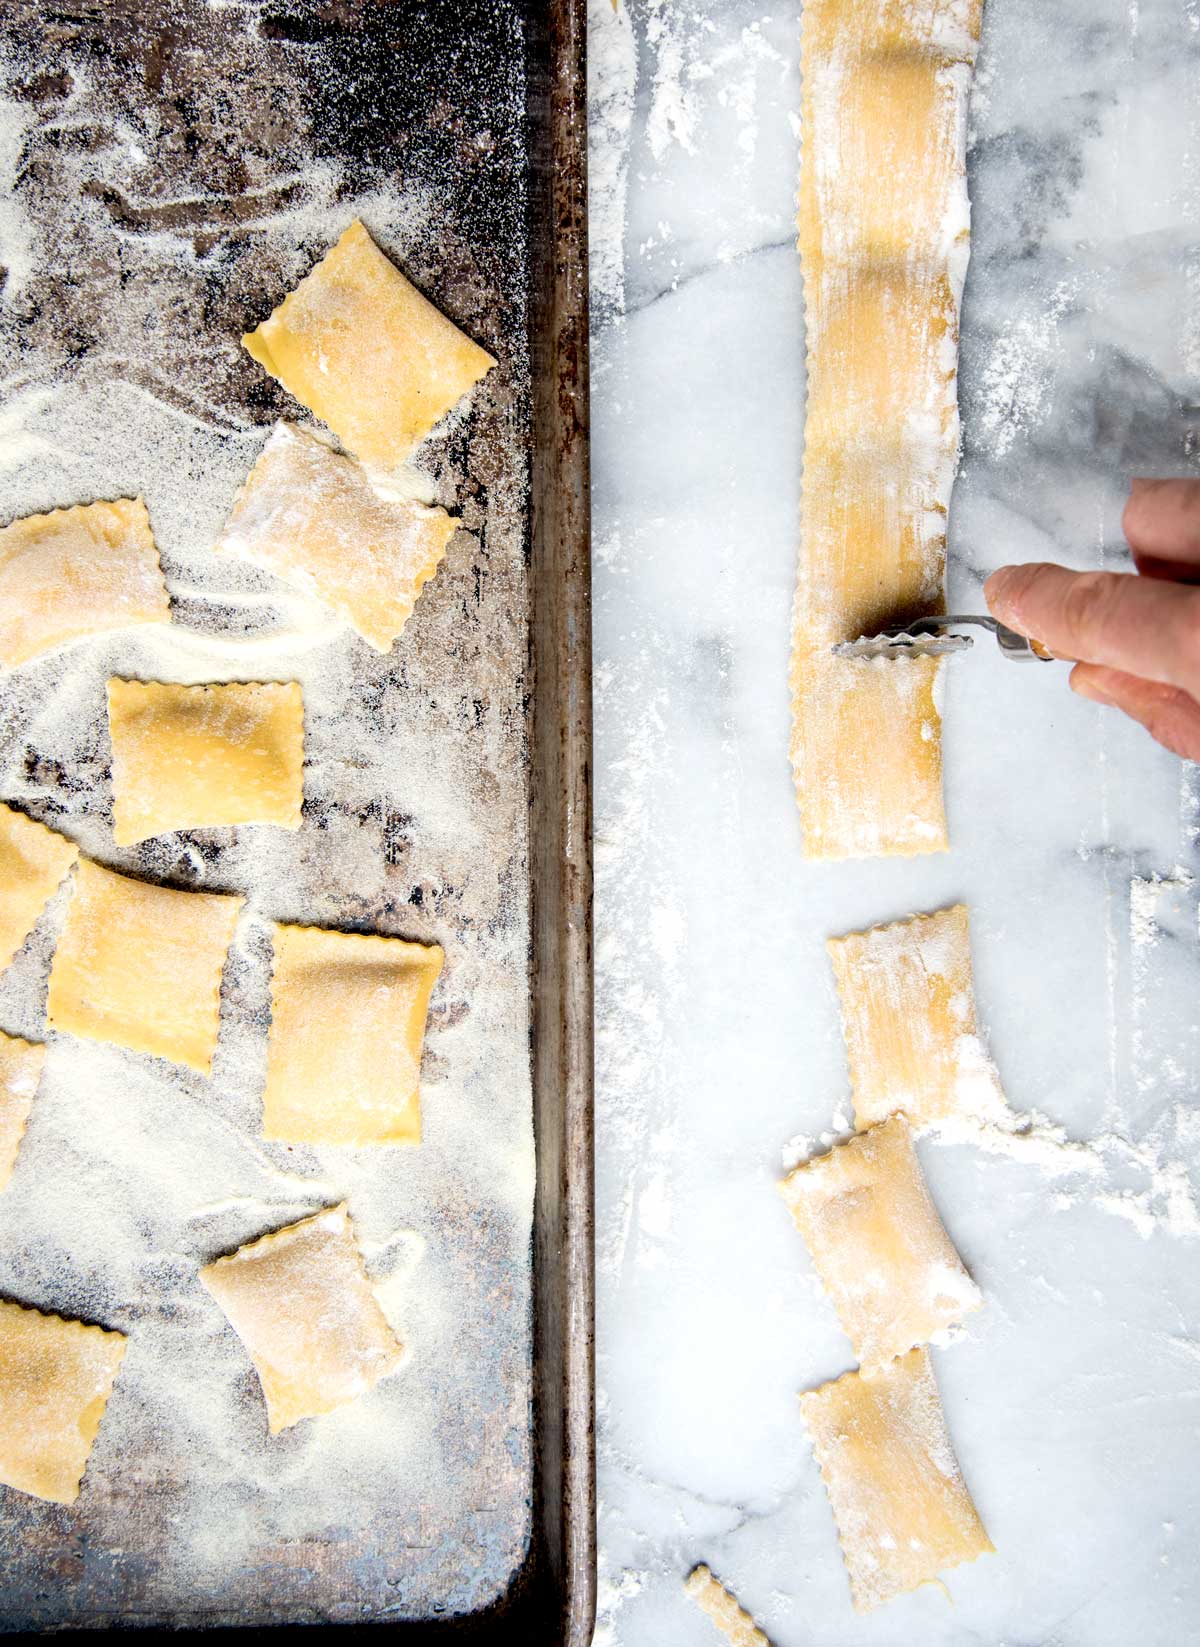
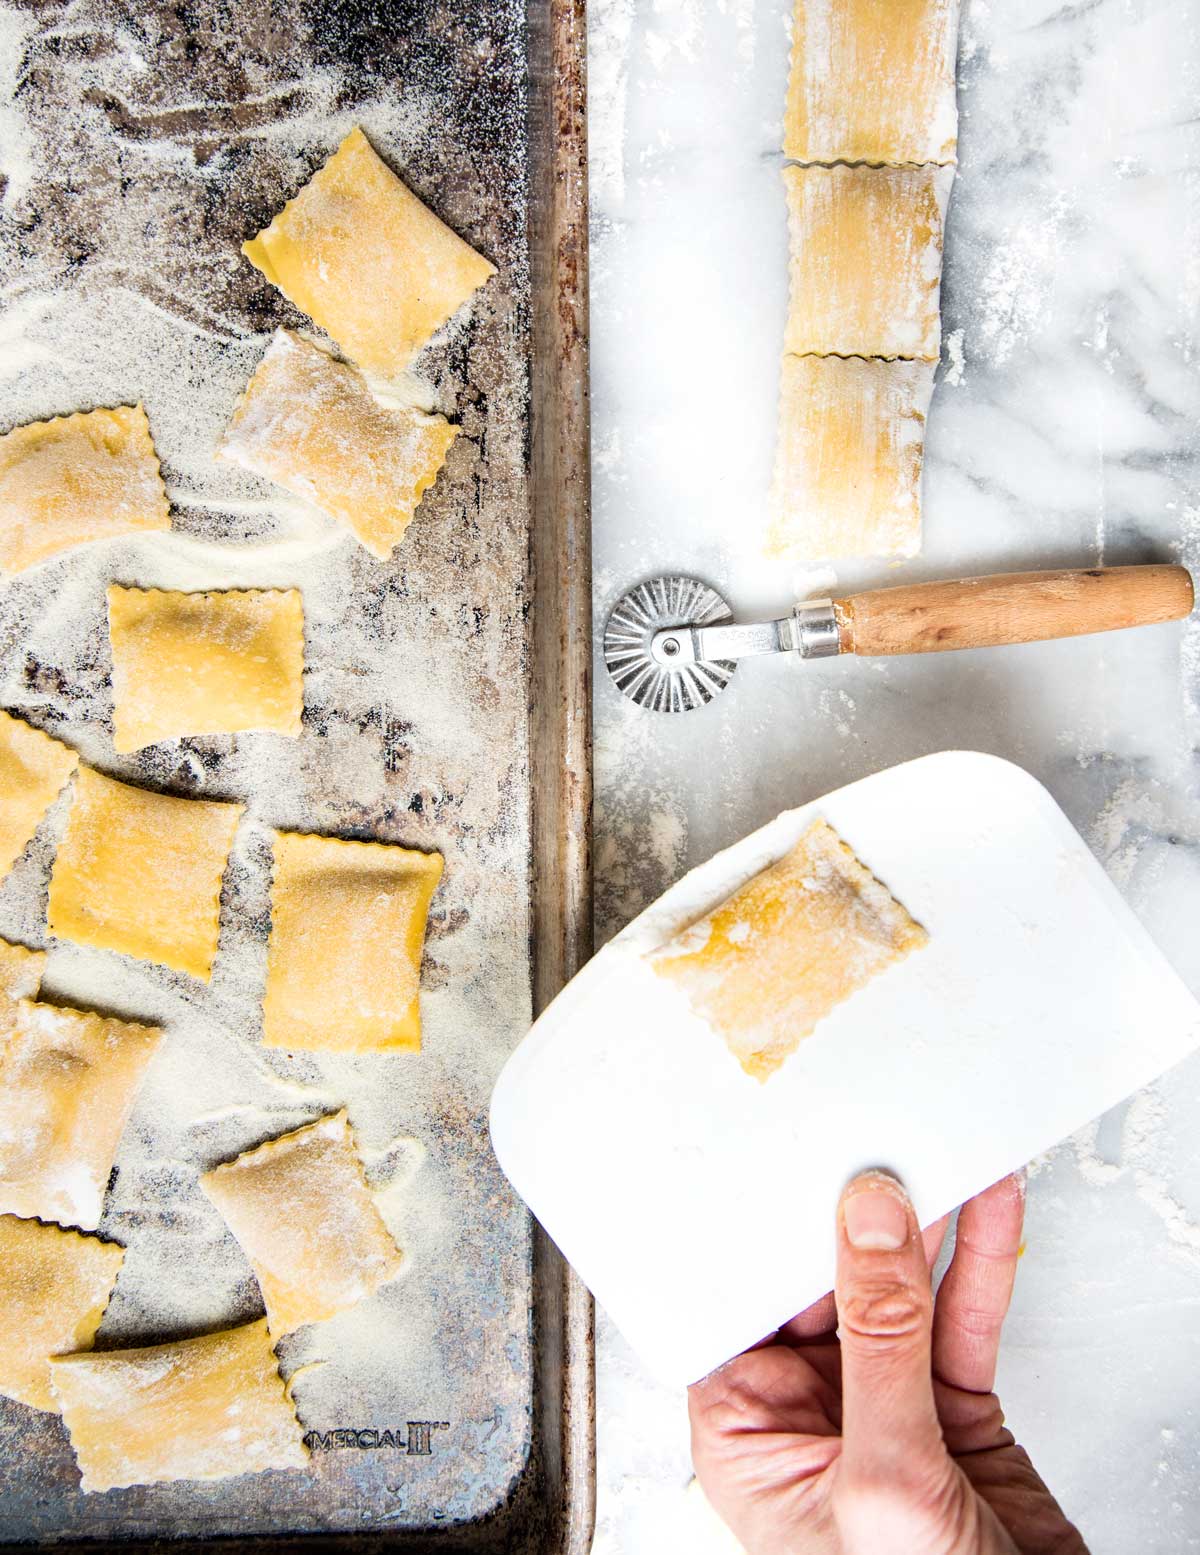
Forming the stuffed pasta….
Ravioli Dough
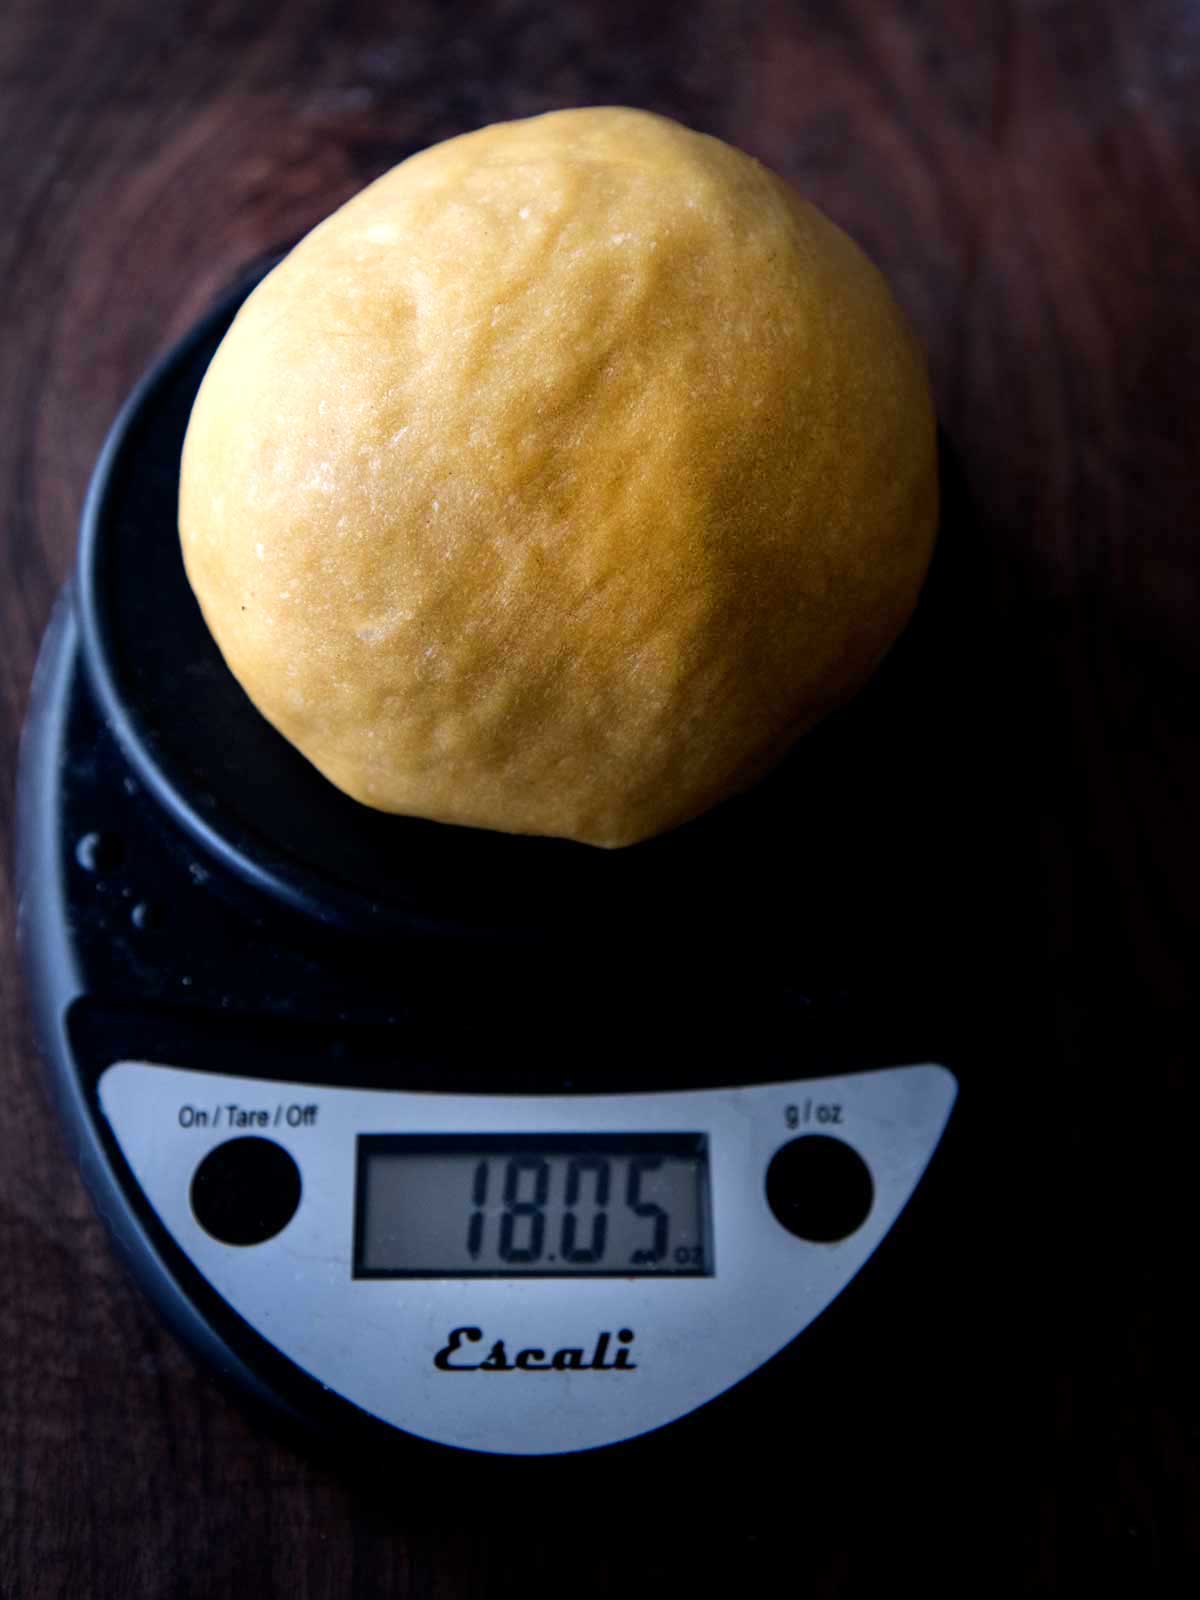
makes 18 ounces of pasta dough
2 well-packed cups (360 grams) 00 flour
1 teaspoon salt
100 grams (2 large) whole eggs
90 grams (about 5) egg yolks
1 1/2 teaspoons extra virgin olive oil
Mix the flour and salt. Place the flour on a dry, clean work surface and form it into a mound. Use a measuring cup to create a well in the middle.
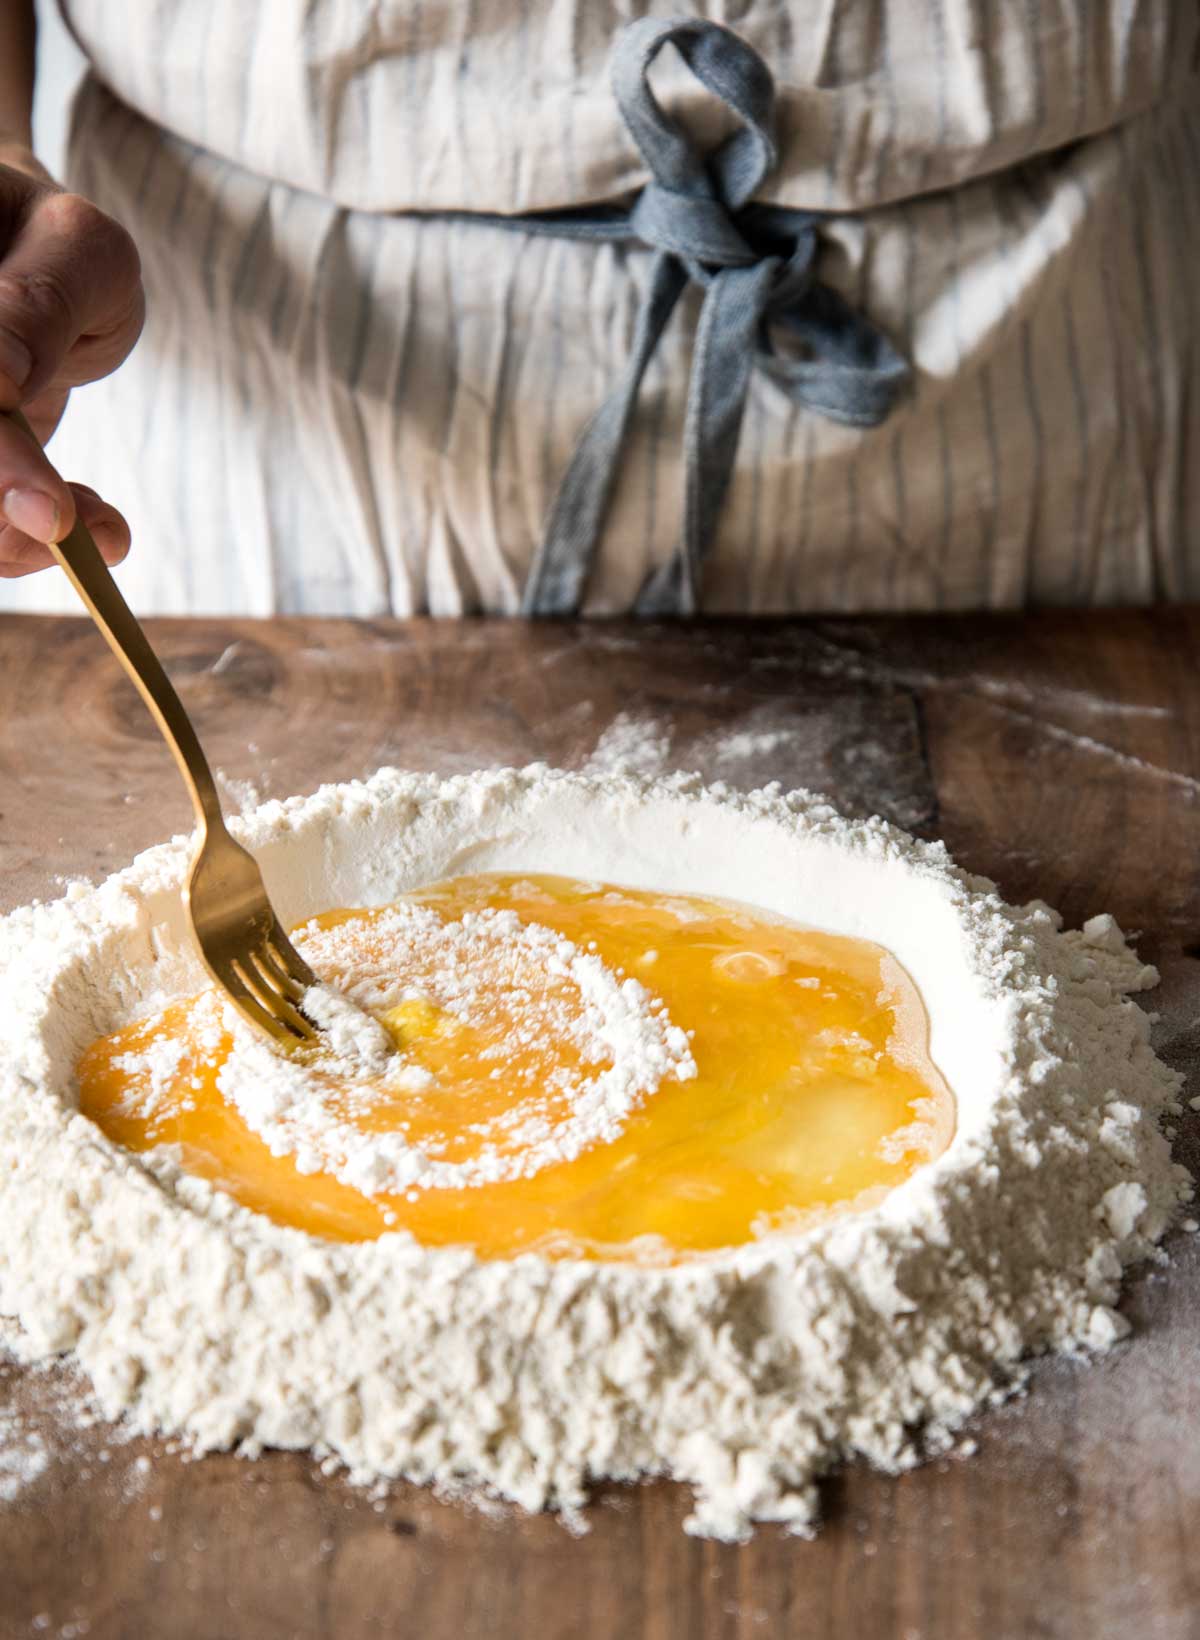
Slowly add the eggs, egg yolks, and olive oil. With a fork, gently beat the eggs; be careful not to disturb the walls of the flour. Slowly begin to incorporate the flour walls into the egg mixture. Continue mixing the flour with the eggs until you have a solid mass.
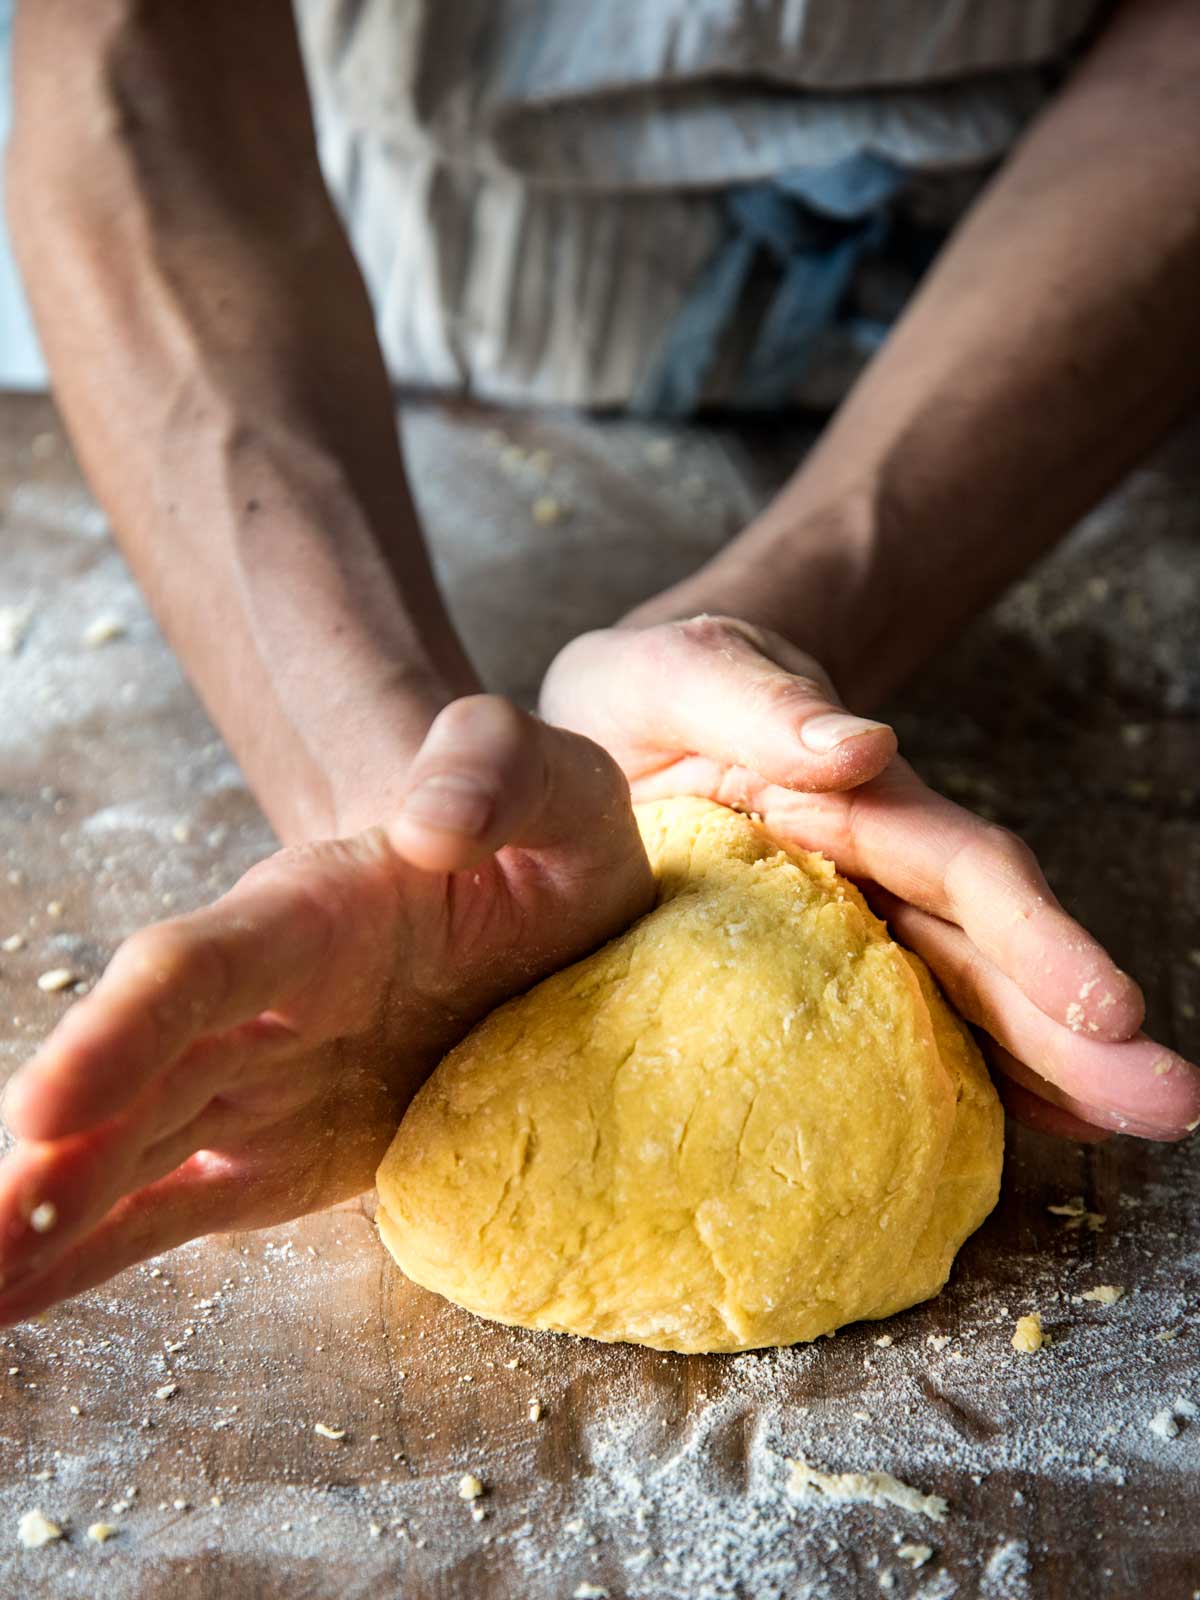
At this point, using your hands, start folding and forming the dough, incorporating the rest of the flour until you have a stiff, solid mass (removing any dry clumps of flour).
Knead the dough. Drive the heel of your hand into the dough, rotate the dough 45 degrees, and repeat until the dough is firm and bouncy and has a smooth, silken texture. Tightly wrap the dough in plastic and let rest 30 minutes.
Butternut Squash Filling
2 1/2 pound butternut squash
Olive oil
Salt and pepper
Few sprigs of fresh thyme
1/3 cup minced shallot
1 tablespoon butter
1/2 cup loosely packed, freshly grated Parmesan cheese
1/2 cup fresh ricotta, drained
Freshly grated nutmeg
To roast the butternut squash: Preheat the oven to 425F. Slice the squash in half lengthwise. Scoop out the seeds. Place the squash, cut side up, on a sheet pan, drizzle with olive oil, and season with salt and pepper. Place a few sprigs of thyme on top. Roast until the squash is fork tender, 50 to 60 minutes. Let cool. Scoop out the flesh and place in a food processor. Discard its skin.
Heat the butter in a skillet. Add the shallot and sauté until soft and golden brown, about 5-7 minutes. Add to the food processor, along with the Parmesan and ricotta. Add a few gratings of nutmeg. Season with salt and pepper. Pulse until combined. Transfer mixture to a piping bag.
To Form the Ravioli
Made about seven dozen ravioli (plus the extra I “tested” along the way in the name of quality control)
Line a baking sheet with semolina flour (to prevent the ravioli from sticking).
Lightly flour your work surface. Cut off a piece of dough, keeping the rest covered in plastic so it doesn’t dry out. Run the dough through your pasta machine starting with the largest setting. Run it two to three times through each successive pasta roller setting until about 1/16th-inch thick (third to the last setting — #6 on my KitchenAid pasta attachment).
Lay the sheet of pasta on a lightly floured work surface to prevent the dough from sticking. Pipe the filling along the length of the sheet, leaving an inch or so between each. Brush the length of the sheet with a little water to seal. Fold the dough over lengthwise. With the side of your hand, squeeze out any excess air in between each mound of filling. With a fluted cutter, cut along the length of the pasta dough. Then cut into individual ravioli. As for the size of each stuffed pasta, I eye-balled it, but if I had to give a more exact measurement, I would say each was roughly 1 3/4-inches long, by 1-inch wide. Place ravioli on baking sheet in a single layer. Repeat with the remaining pasta and filling.
Bring a pot of water to a boil. Salt the water. When it comes back to a boil, drop in the pasta (working in batches, a dozen or so at a time). Cook until 80% cooked through, just a minute or two.
Meanwhile, heat a skillet over medium heat. Melt a couple tablespoons of butter. Add a tablespoon or two of pasta water and swirl. Add some freshly grated Parmesan. With a slotted spoon transfer the ravioli to the skillet and gently toss the pasta in the butter. Cook another minute or two until al dente. With a slotted spoon, transfer to serving plates. Spoon a little hot butter on top. Top with toasted breadcrumbs and crispy sage leaves. Drizzle with balsamic vinegar and a few grinds of black pepper. Serve immediately.
Leftover ravioli can be frozen. Place baking sheet with leftover ravioli in the freezer. Once frozen, transfer to zip-lock bag or air-tight container.
* To crisp up the sage leaves: heat a little olive oil in a small skillet. When sizzling hot, add a small handful of sage leaves and cook until crispy, a few minutes. Place on paper towels to drain.


4 comments
Joan A
This sounds so delicious. I’ve always wanted to make ravioli…what makes these agnolotti?
BTW…I found your site while searching for Sardine meatballs ( they were delicious!)
These beautiful photographs make me want to make pasta! (I had a pasta machine at one point but just hated it!)
One question…where does one find 00 flour in New York?
wildgreensandsardines@gmail.com
Hi Joan, I’m not sure these are technically agnolotti, maybe more a cross between ravioli and agnolotti. I find 00 flour at Whole Foods. Any Italian grocery should have it as well. It takes some practice and patience to make fresh pasta. I’m still learning. I really like the Flour + Water Cookbook, lots of great pasta recipes. Glad you enjoyed the sardine meatballs. Not too many fellow sardine lovers out there. Cheers! Linda
Damon
Hi Linda,
I just wanted to let you know that I made this dish last night, and although I may have missed a couple of steps in my panic to get it on the table still hot, it was fantastic. I served with with a side of rapini which was a nice balance. I will definitely make this again and I’ll probably make it better next time because practice makes perfect.
I also just wanted to compliment you on the next-level photography on your site, and on your recipes in general. I found this page by searching for a good recipe for pasta stuffed with squash, but having looked around this site and on Linda Ravioli, I’m extremely impressed and will definitely come back for more. Thanks for the recipe, and keep up the amazing work you do!
wildgreensandsardines@gmail.com
Hi Damon, So glad you gave it a try and it turned out well! Homemade pasta is definitely a labor of love. It does get easier with practice. There’s so many shapes and fillings that it never gets old. Thanks so much for your kind words as well. I’ve been working on the photography for the past 10+ years, learning as I go. Happy cooking (and pasta making).